(or I'm still blatantly stealing ideas!)
I love the small clumps of tall, dry grass that
+Paul Ward has done over at
Matakishi's Tea House. His design is pictured below:
 |
| Paul Ward's awesome grass bundles |
As I was thinking about getting around to building some of these, I was cleaning up the garage and throwing out a ton of old computer CD-ROMs that my wife had brought back from her mother's place. (yes, there was actually an AOL signup CD in there!)
A quick hit of my basic brown base color on both sides of the CDs and they were ready to go. I put the paint on both sides for two reasons. I wanted it to look somewhat nice overall, and I knew I'd be putting the "label" side down and smooth side up, as I didn't want my terrain to say McAfee Internet Security in bold letters... I also wanted to provide a good surface for the glue sticks and PVA glue to grab onto, so it needed some sort of primer over the plastic.
 |
| freshly painted CD-ROMs |

I threw the CD-Rom onto the paper plate (yes, to contain the mess of basing sand AND the hot glue gun sticks.)
As discussed, on this batch I mounted it "label" side down as I thought I'd want a smooth surface to put the basing sand over. On the latter bases, I opted to go "label-up" in order to hide all of that unsightly text underneath the basing sand. In my mind, it looks more professional with a smooth base underneath it when picked up.
So before you get all excited and start gluing grass and basing sand to the CD, place a small section of painter's tape over the center hole, so you can get a good flat glue spot there that doesn't adhere to your paper plate or work surface. (and no, I didn't make that mistake on a previous iteration! I'm pretty proud of myself that I had the forethought to put the tape on FIRST!)
Once you get the tape in place, it is time to start adhering "grass" materials.

To properly size the "tall grass", I wanted it to be able to provide almost total cover for my modified Ironstriders/Dragoons, so I used one of them as a reference and started cutting. I cut a good amount of the bristles to be the largest height, but then decided that the outlying bushes should be a bit smaller.
It works very well to cut all of the varying lengths FIRST, and then combine them into a grouping that you will place into the glue.
You can also see that I did make a mistake by purchasing a small hand broom instead of a larger one. The ends are a lot more uniform and less "grass-like" than the ones in Paul's terrain. Note to self, make a second batch that is more "grass-like" if required. (I'll just say that this grass is more like bamboo!)

Since the CDs were a bit bigger than Paul's cork bases, I decided to NOT overload it with grass, but rather to leave room for units to move into the terrain to gain the benefits as area terrain. To make each of the bundles, just put a half-inch circle of hot glue and press the "grass" into it and hold. And if you bought the "regular" glue instead of "fast-set", continue to hold. and hold. Second Note to self - Buy "fast-set" glue sticks next time!

A liberal painting with watered down PVA glue and it was ready for my basing sand mix. Here is another departure from Paul's design. I didn't opt to put small rocks around the base of the grass bundles. That was primarily due to not having any handy! Instead I went back and re-painted several of the humps with glue to make sure that there was good coverage up to the base of the grass stalks.
It may be a bit tricky to get some basing sand in between the stalks if you have glued multiple bundles down in an incremental fashion, but most of those problems were solved by watering the glue mix down more and dropping the sand in at an angle.
(which is why the rocks would have been a good idea!)
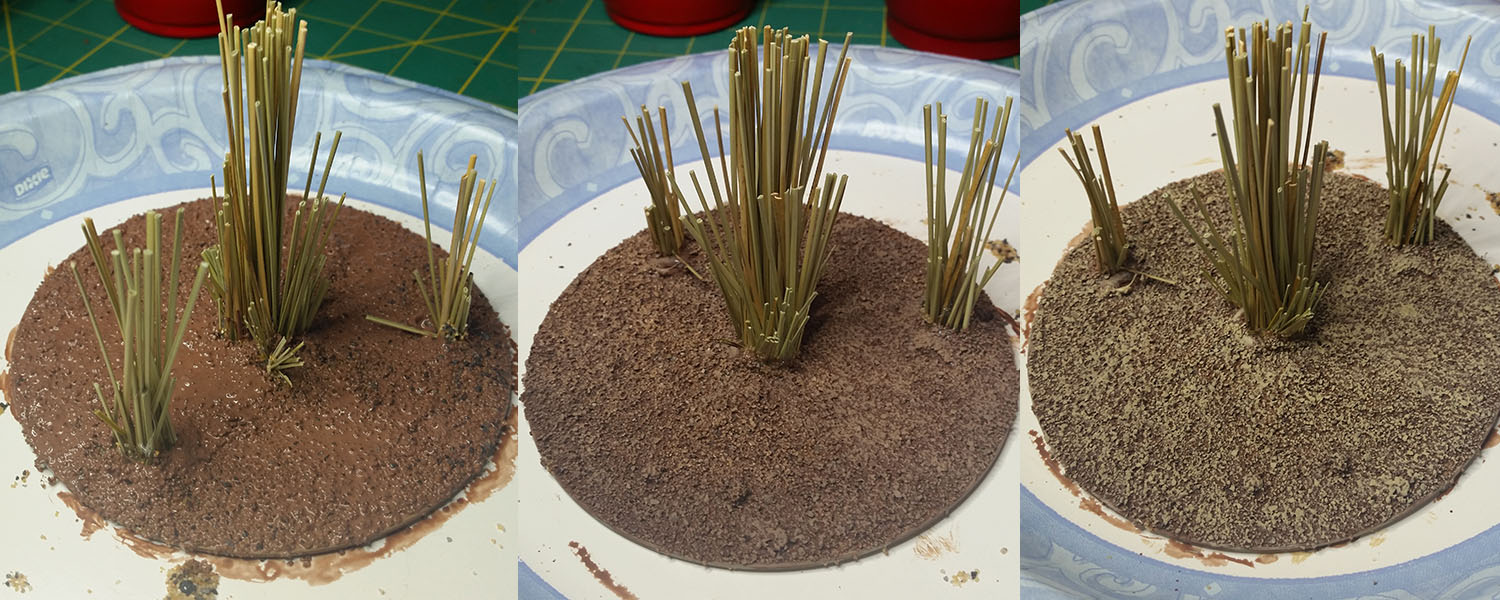
As with previous terrain, I used the same 3-color craft
basing paints (Brown Oxide, Territorial Beige, Khaki) to tie it in with my high desert terrain theme.
 |
| All three colors by step |
So here is the finished product, with both a Marine and a walker for scale. How did it turn out? Pretty good, I think. While it doesn't look as brush-like as Paul's terrain, it fits what I need for my 40k table.
 |
| Grass now provides significant cover for both the infantry and walkers |
I've got a few lessons for the next 5 I have to build, but at least I think I've got a product that will look good on the table without being too difficult to manufacture. (and once I'm done with this batch, the next ones will be made from the CORRECT size broom!)